Microsoft MFA - Technology
SECURE YOUR ACCOUNT with MFA
Multi-Factor Authentication (MFA) Registration
Steps to complete:
Step 1. MFA Registration: At a minimum, select at least (1) of the following Authenticator App or Phone. You can register both, as shown below.
Step 2. SSPR Registration: At a minimum, select at least (1) of the following Office Phone or Email (Non-*nps.edu Email). You can register both, as shown below.
Click + Add method below! Once navigated, sign-in with NPS credentials. Ensure you have one method from each category, as shown above. Once you have registered one method from each category, your required actions are complete!
Click the + Add Method below, and sign-in to get started
OR
Review the supporting information below first
Have additional questions? Contact your ITACs helpdesk at 831-656-1046
What is Multi-Factor Authentication (MFA)?
Multi-factor authentication (MFA) is a security measure that offers an additional level of protection for accessing your personal information and sensitive university data by requiring an additional form of identification at login. There are three forms of authentication (Something you: Have, Know, or Are), two of which we employ at NPS:
Something you know:
- Password/Pass phrase (i.e., NPS Username / Password)
Something you have:
- Security Token or App (e.g., Cellphone with Microsoft Authenticator)
- Verification Text, Office Phone Call, Email
- Smart Card (e.g., Government-issued CaC card)
NPS requires that our users select two methods; one from each of the following groups:
- (Group 1) Authenticator App (Recommended) , Phone
- (Group 2) Office Phone, Email
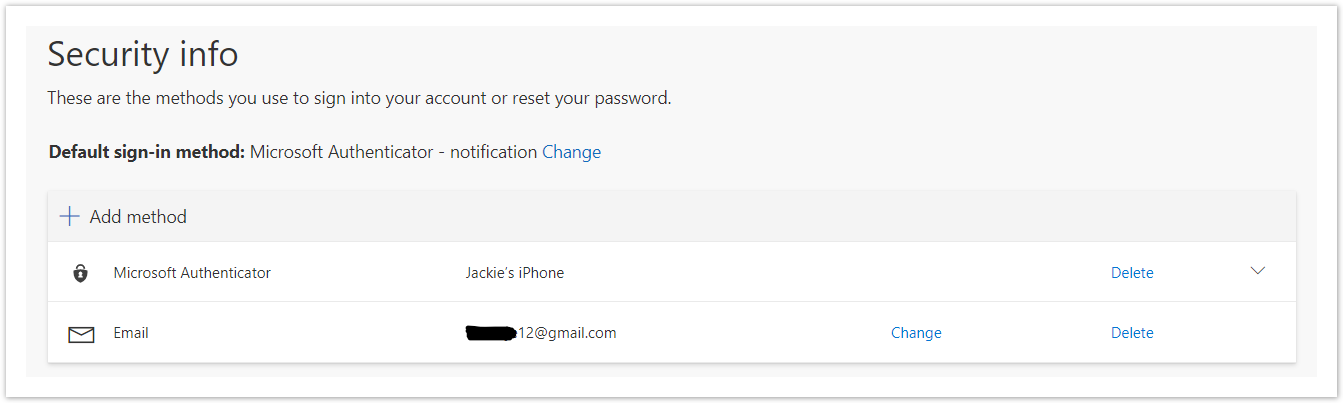
Example: The user in the example has set-up two methods, the Microsoft Authenticator App and a personal email. The user's security-info choices meet the NPS requirement of a selection from both groups.
How To Register/Manage your NPS User MFA Settings?
Before setting up MFA, please read the following:
-
Use a laptop or desktop computer to complete the initial set-up.
-
Have your mobile device with you during set-up to scan a QR code and install the mobile app.
-
During set-up of the mobile app, you will need to allow access to your mobile device's camera when asked.
-
Log into to Microsoft My Account → Click on Sign out everywhere under your profile picture and name
It is highly recommended to enroll multiple devices in case one is lost or you only have access to one at a given time. It is important to have a backup.
Registering Your Security Information
Follow the following steps to enroll your smart phone or tablet to use the Microsoft Authenticator app for app notifications.
- Go to MFA Self Enrollment Portal(it is recommended to do this on a laptop/computer so you can scan a QR code with your phone)
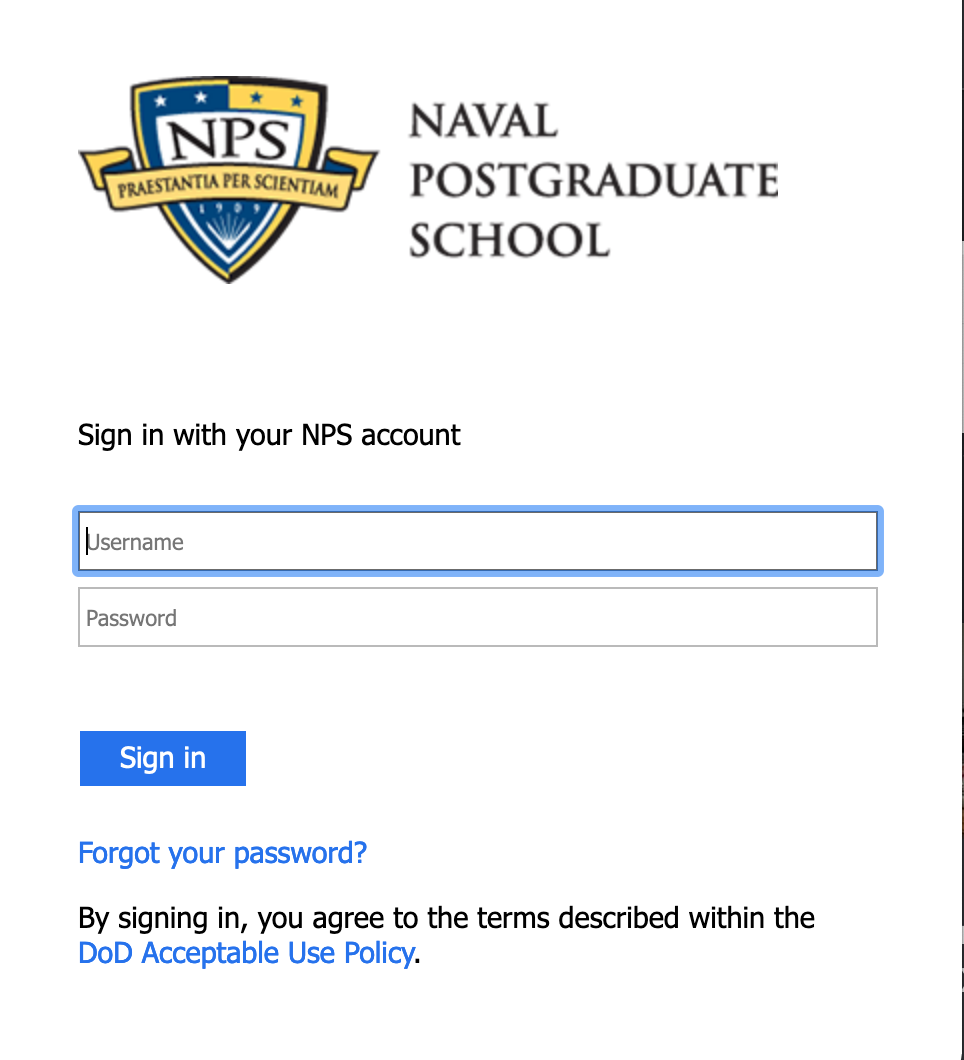
- Sign in with username/password (and MFA if you are already enrolled)
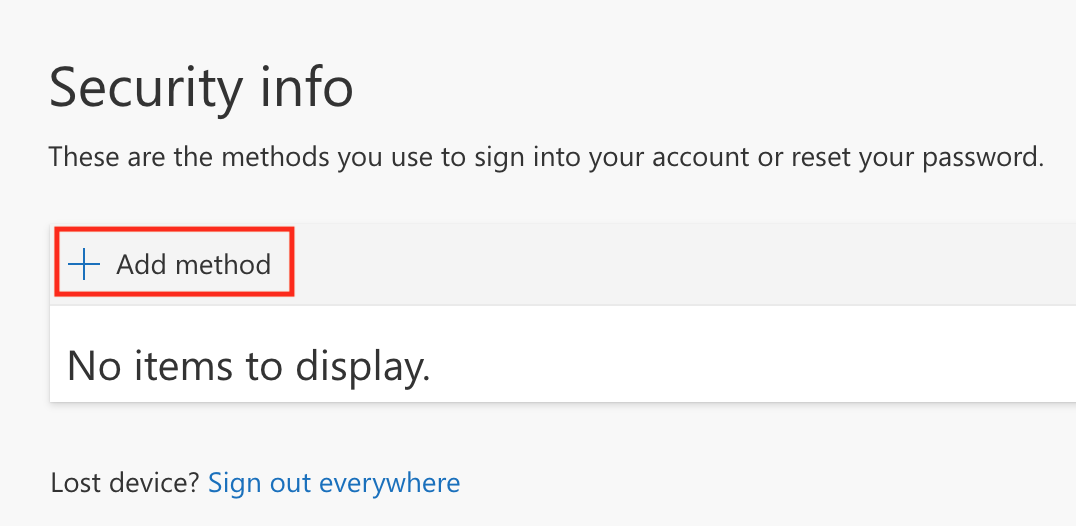
- Click +Add method
a.
- On the dropdown, choose Authenticator app and click Add
a.
- Download the Microsoft Authenticator app in the Google Play Store for Android or Apple Store for iOS then click Next
a.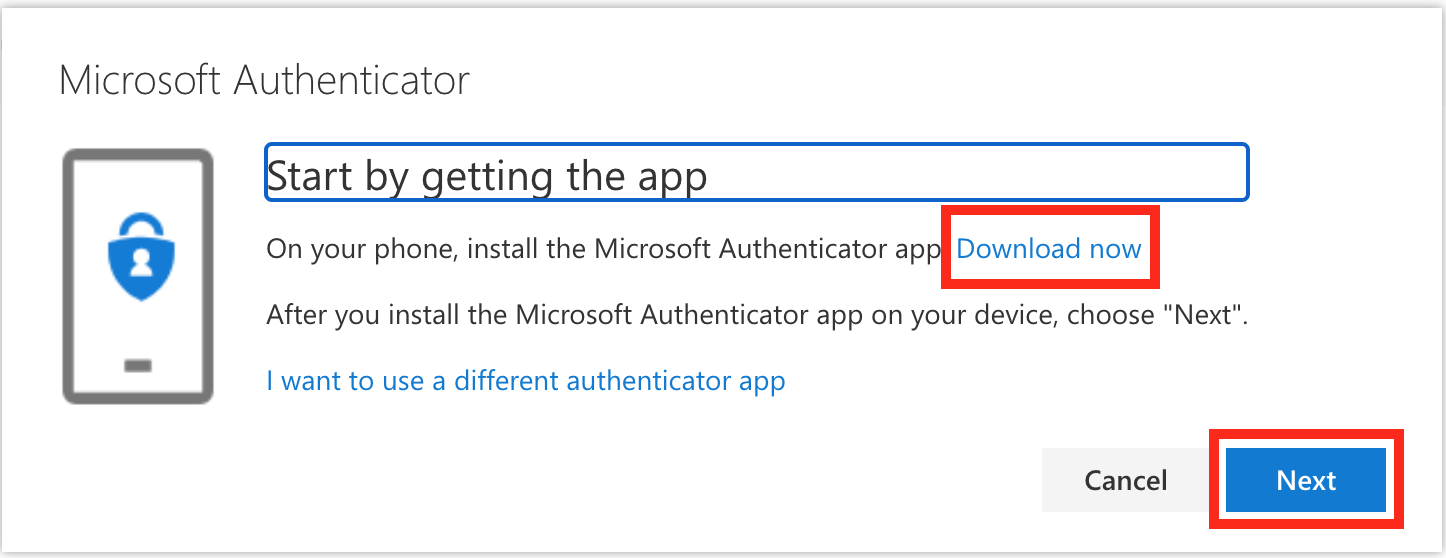
- On the app, choose Work or school. On your computer screen, click Next.
a.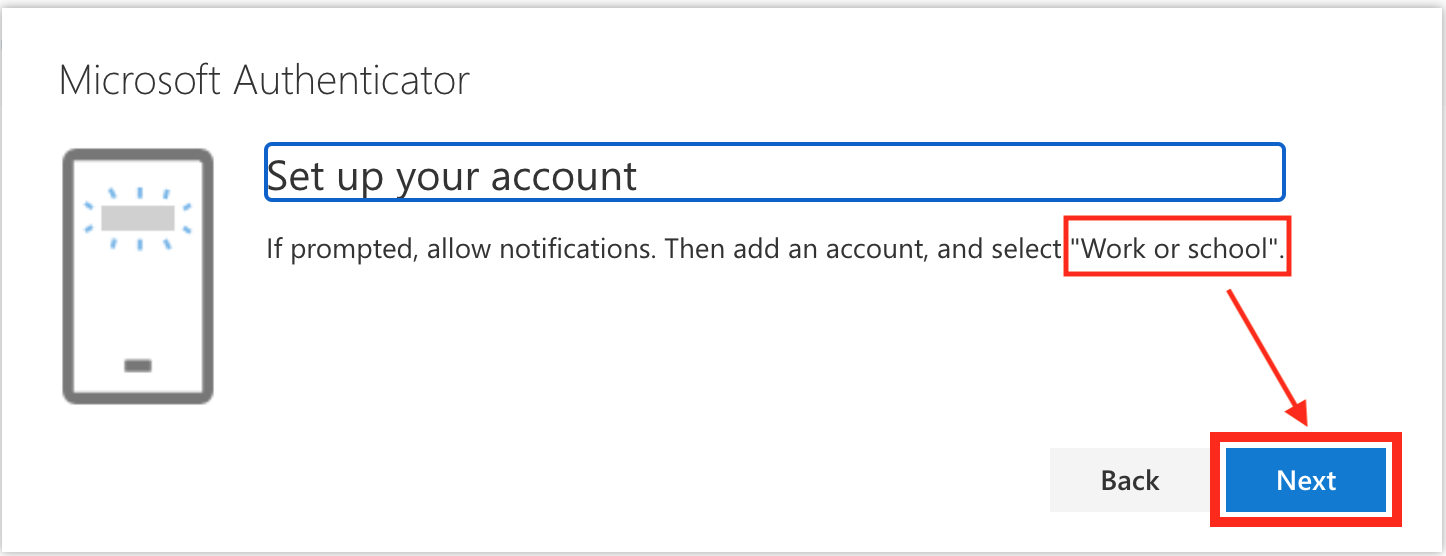
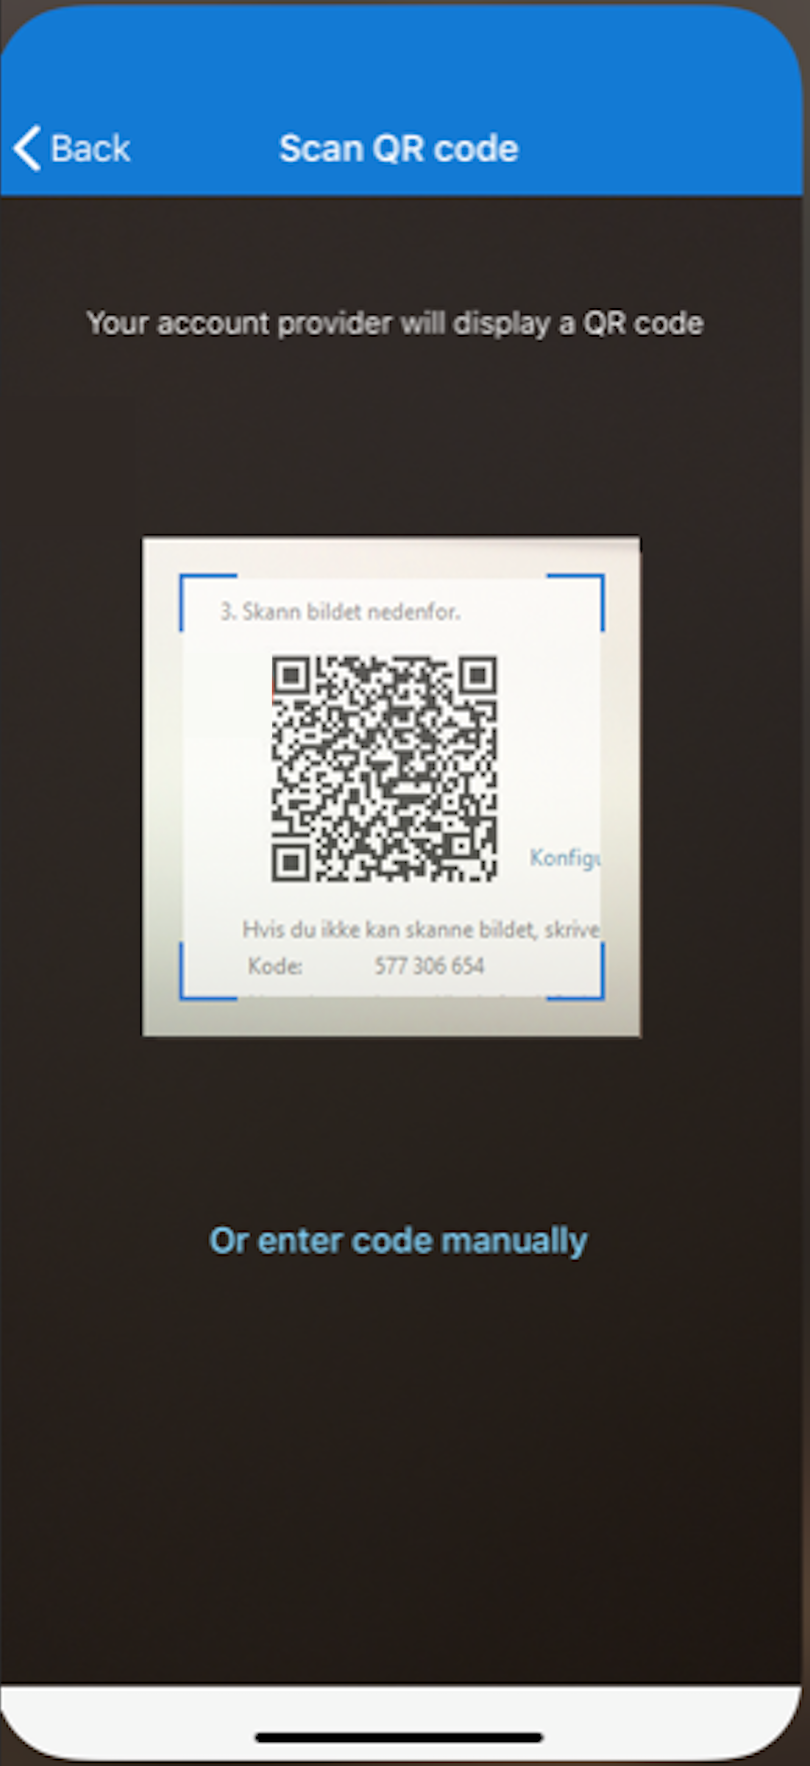
- With the app, scan the QR code on your computer. Then on the computer, click Next
a.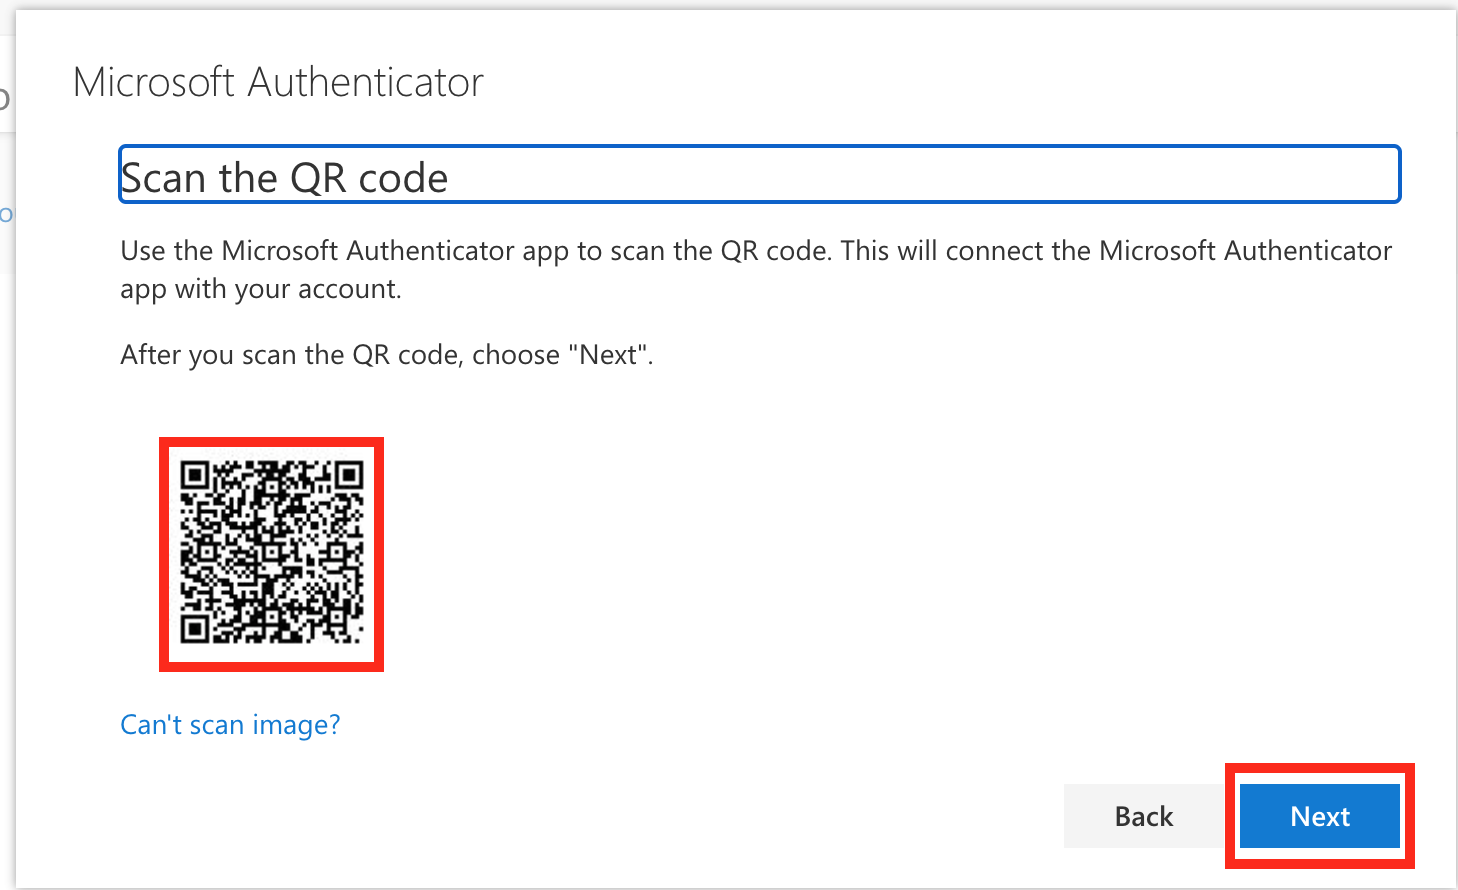
- You will receive and app notification on your phone. Accept the app notification then click Next on your computer
a.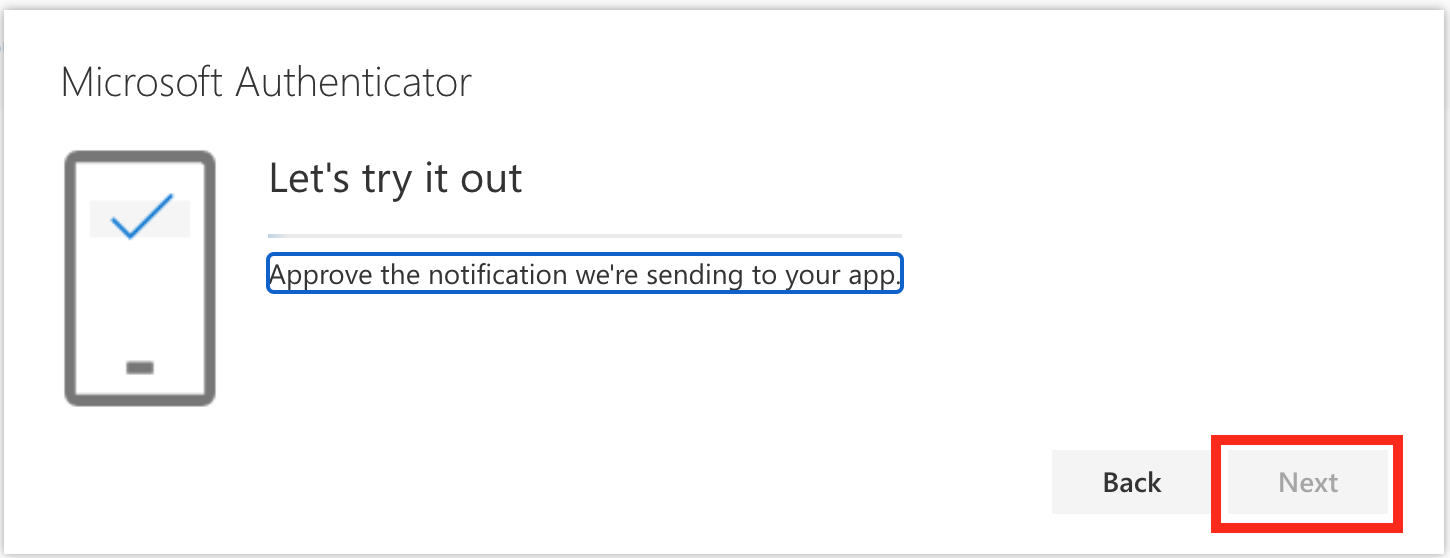
- You have successfully verified the app is working. Click Next.
a.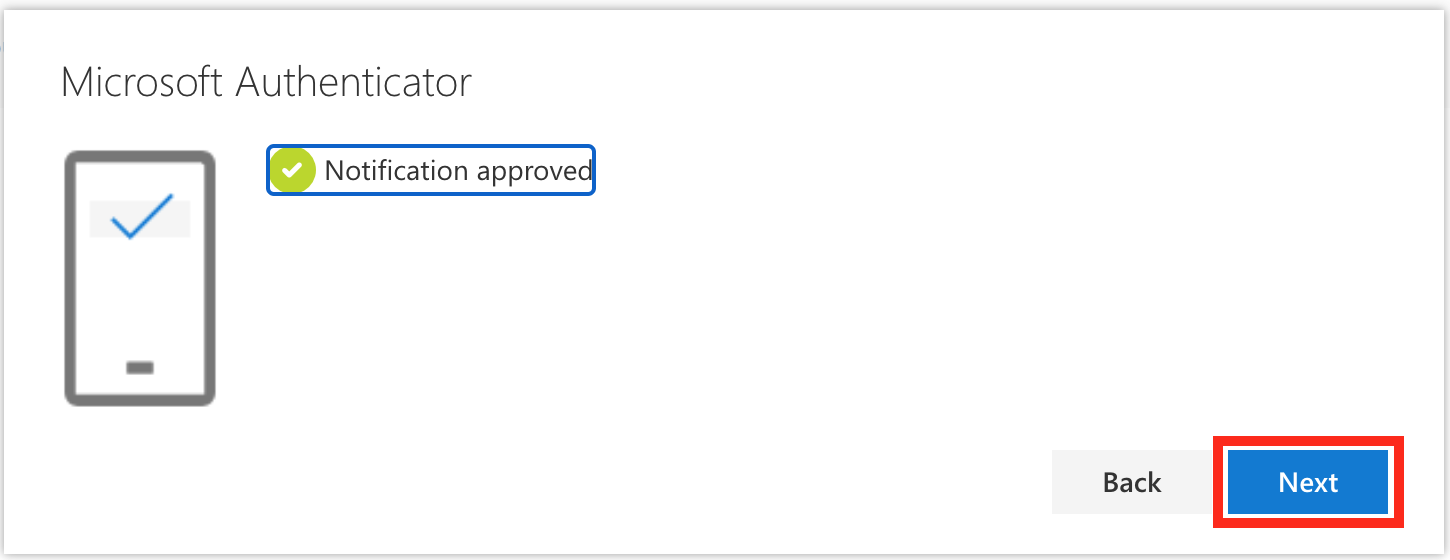
Your smart phone/tablet is successfully enrolled with the Microsoft Authenticator app
a.


Follow the below steps to enroll your office phone/landline for calls.
- Go to MFA Self Enrollment Portal
- Sign in with username/password (and MFA if you are already enrolled)
- Click +Add method
a.
- On the dropdown, choose Office phone and click Add
a.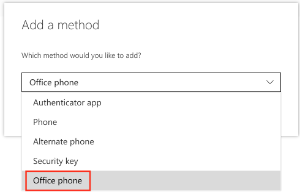
- Enter your office phone number and click Next
a.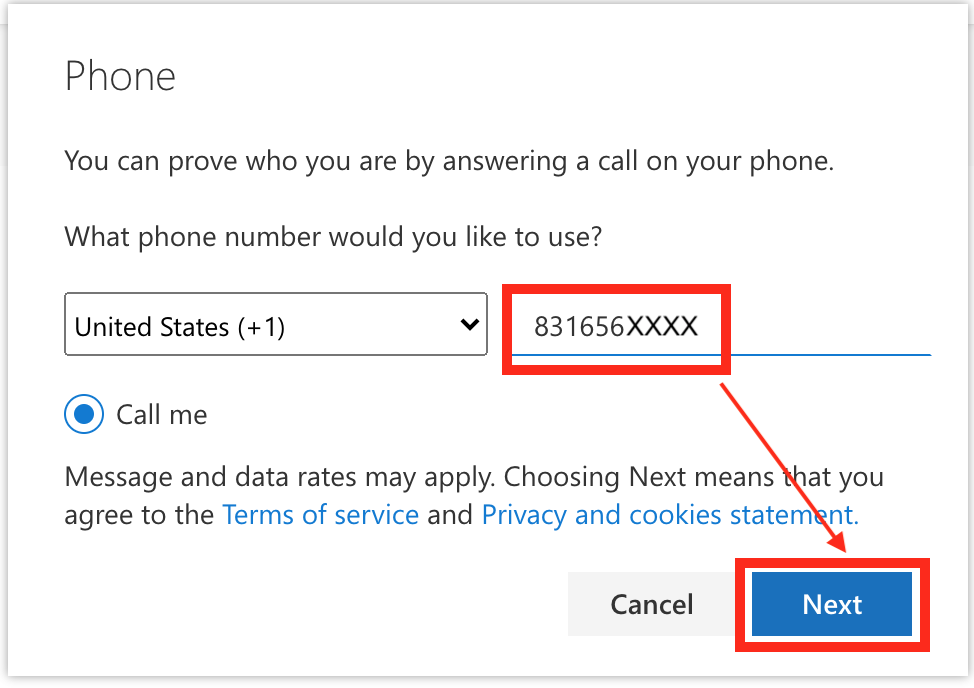
- You will receive a phone call on the office phone to verify your number, answer it and follow the instructions on the phone.
a.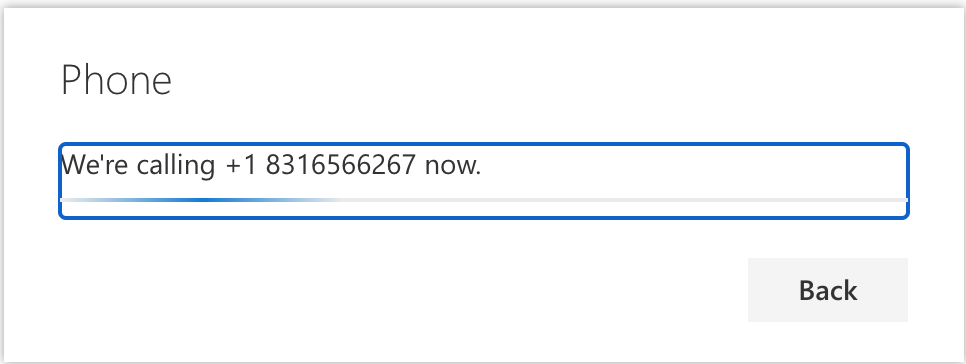
- Your phone was successfully verified, click Done
a.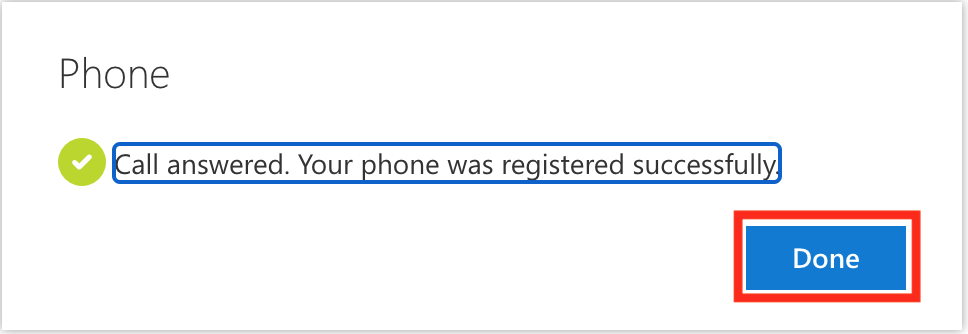
- Your office phone is successfully enrolled for calls
a.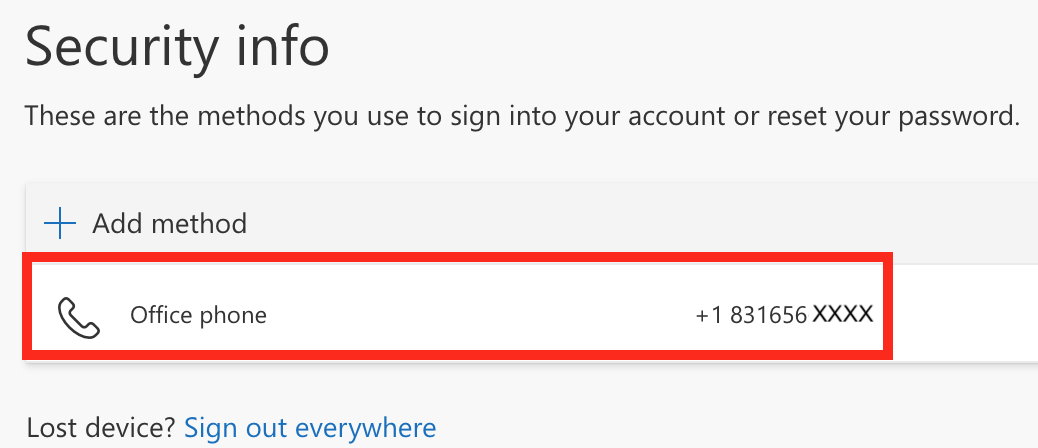


Follow the below steps to enroll your Phone for calls. This can be a personal or government provided phone, a cell phone or home landline. This phone does not need to be a smartphone.
- Go to MFA Self Enrollment Portal
- Sign in with username/password (and MFA if you are already enrolled)
- Click +Add method
a.
- On the dropdown, choose Phone (or Alternative Phone if this is another phone) and click Add
a.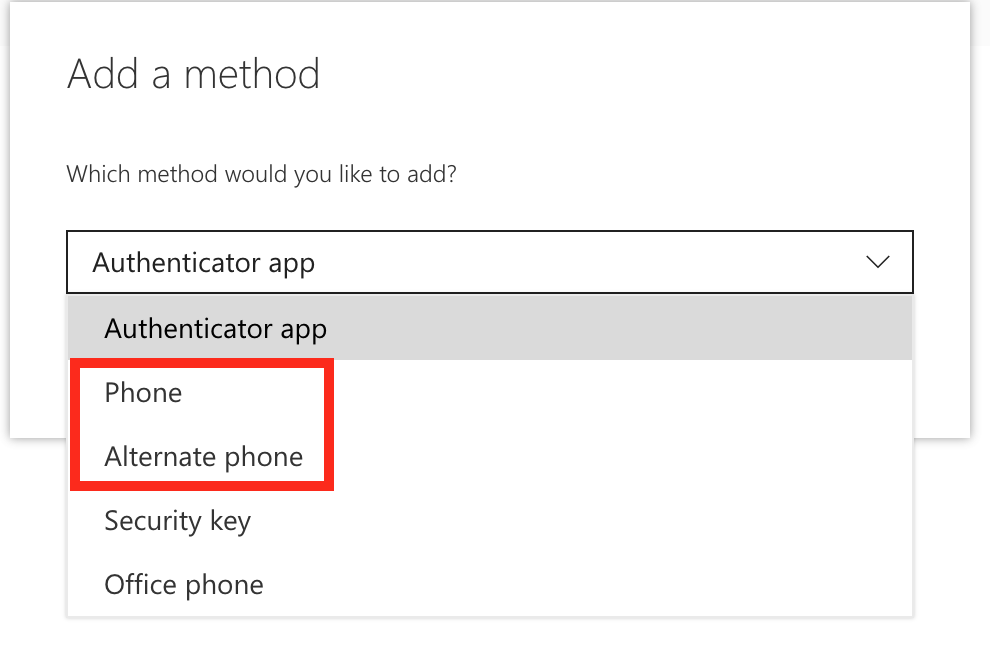
- Enter your phone number, choose Call me, and click Next
a.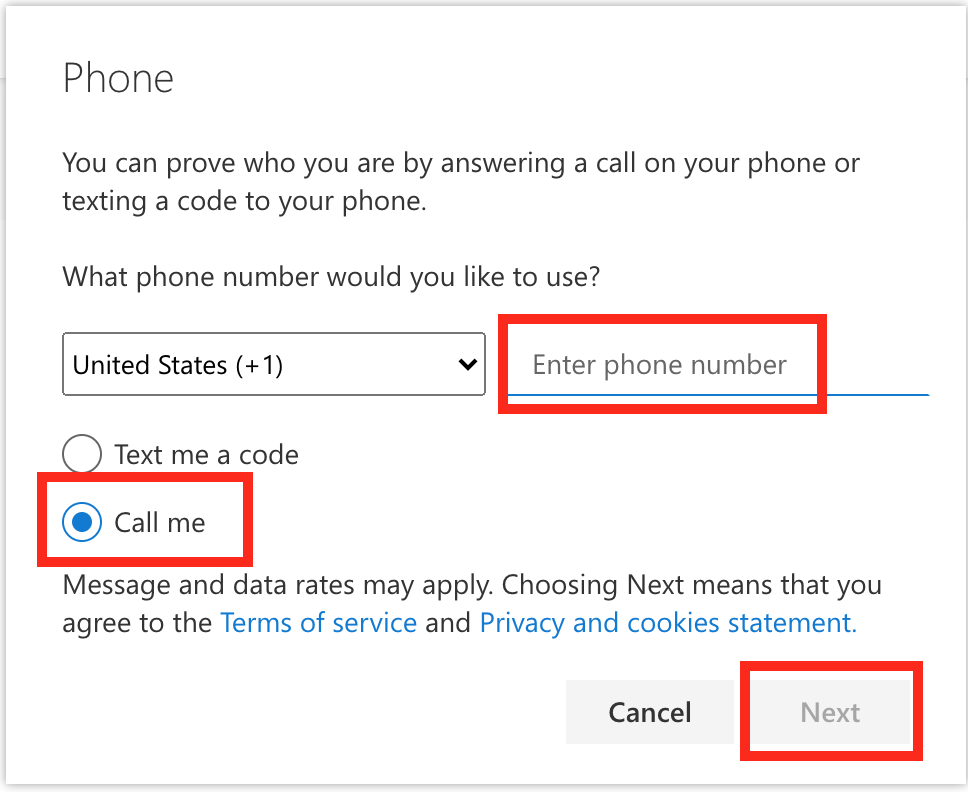
- You will receive a phone call on your phone to verify your number, answer it and follow the instructions on the phone.
a.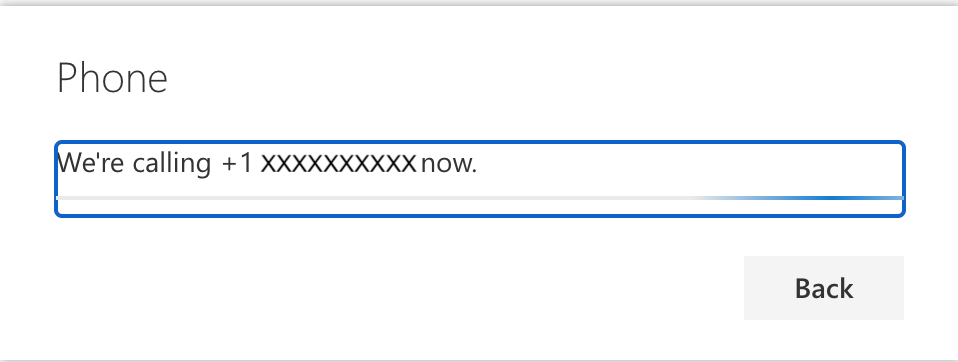
- Your phone was successfully verified, click Done
a.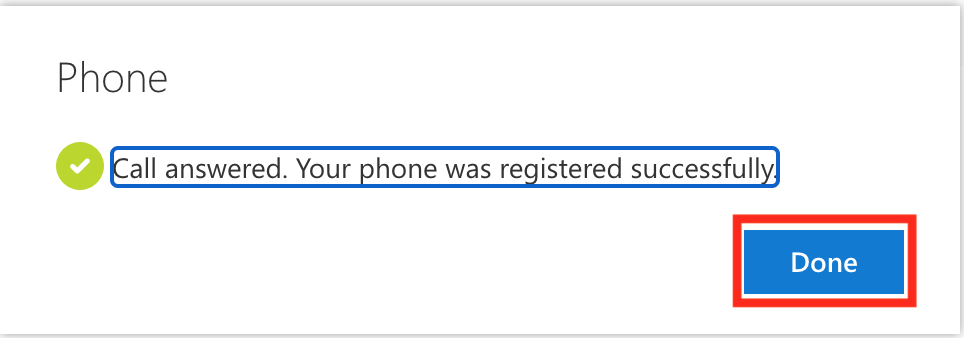
- Your phone is successfully enrolled for phone calls
a.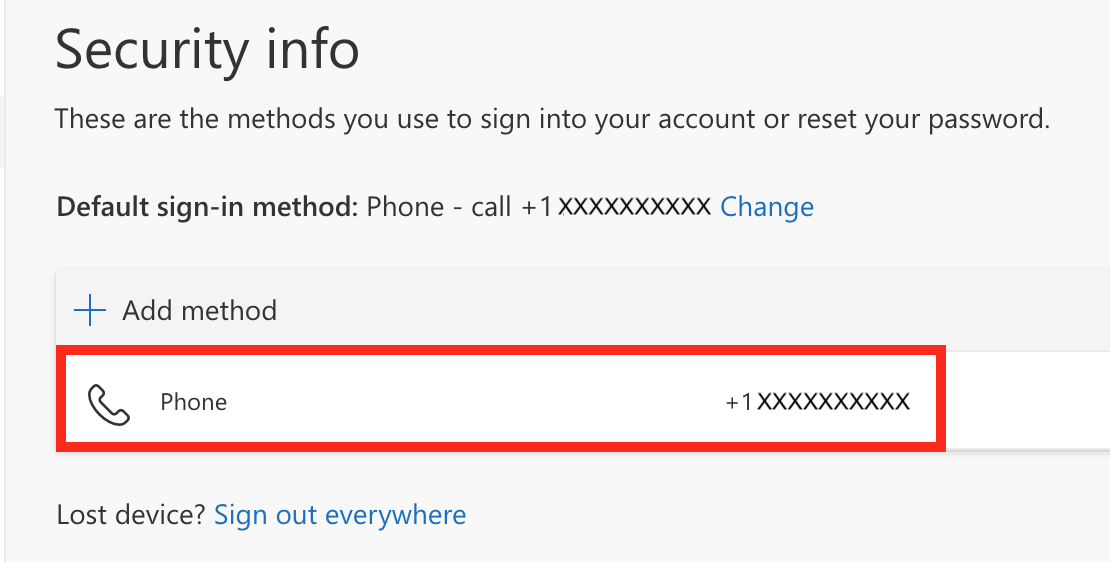


Follow the below steps to enroll your Phone for text/sms messages. This can be a personal or government provided phone, a cellphone or home landline. This phone does not need to be a smartphone.
- Go to MFA Self Enrollment Portal
- Sign in with username/password (and MFA if you are already enrolled)
- Click +Add method
a. - On the dropdown, choose Phone (or Alternative Phone if this is another phone) and click Add
a. - Enter your phone number, choose Text me a code, and click Next
a.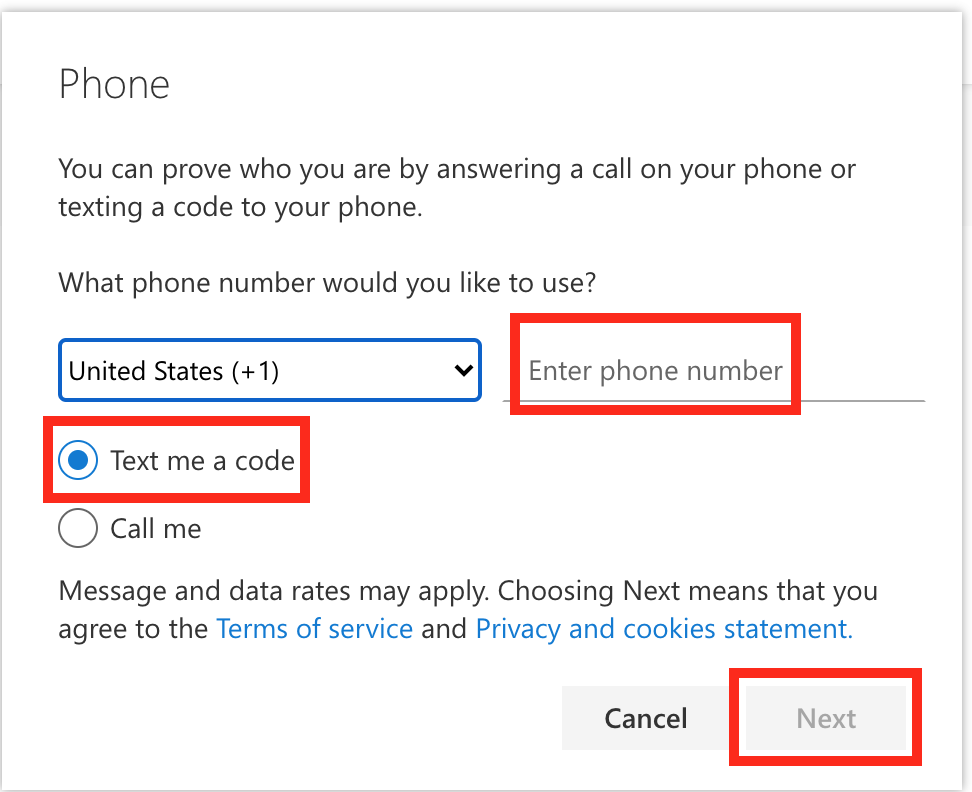
- You will receive a text/sms message on the phone to verify your number.
a.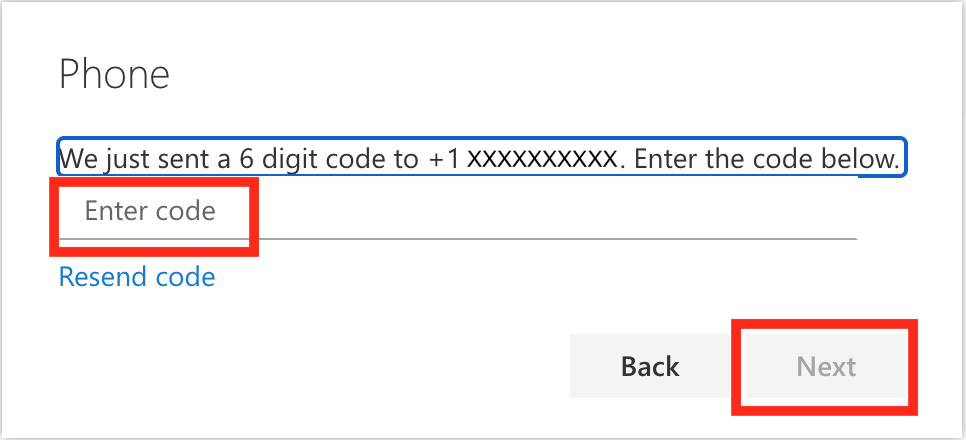
- Your phone was successfully verified, click Done
a.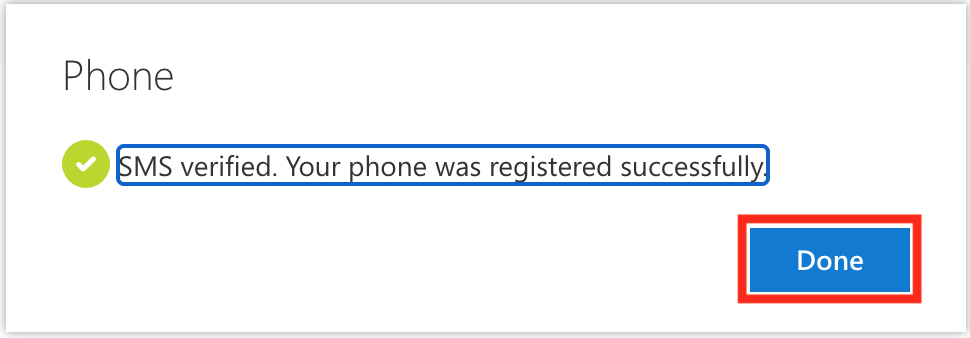
- Your phone is successfully enrolled for text/sms messages
a.


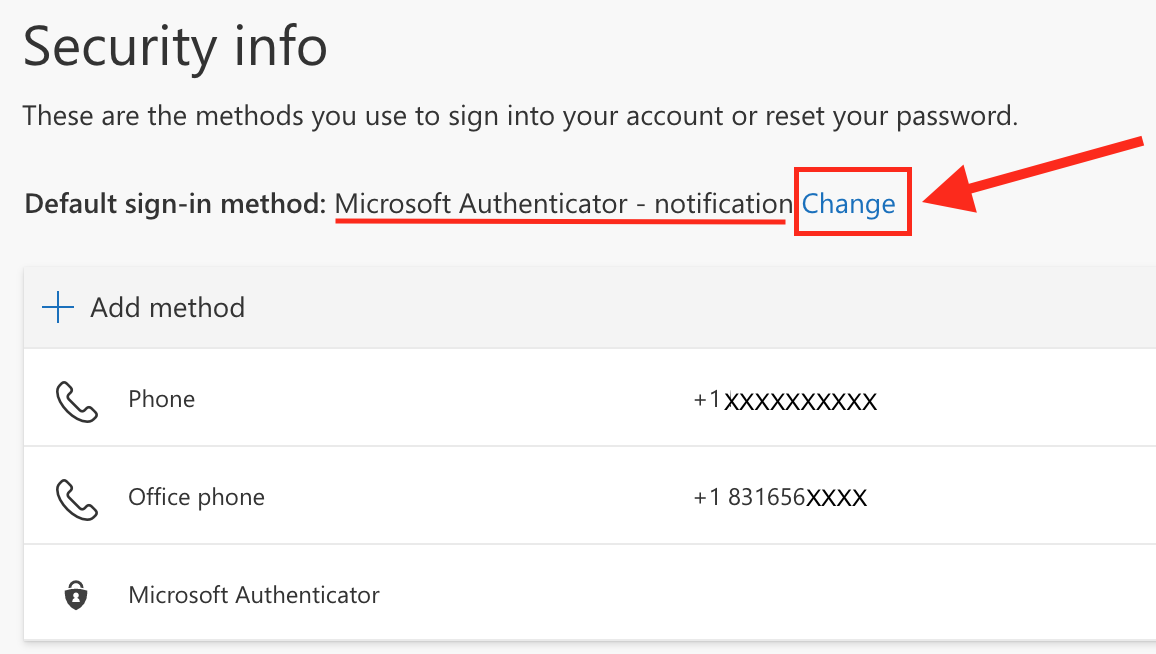
Choosing your Primary Microsoft MFA Option
If you have multiple devices enrolled in MFA, choose your primary device and MFA type. See below for instructions.
- Go to MFA Self Enrollment Portal
- Sign in with username/password (and MFA if you are already enrolled)
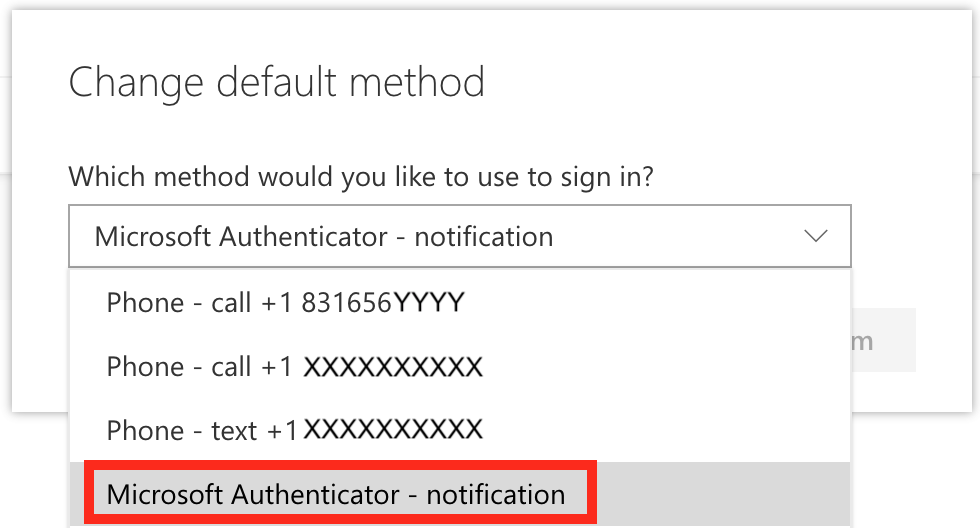
- Click on Change
- Choose an option from the dropdown that you prefer (Microsoft Authenticator - notification is highly recommended)


Your Experience When Signing In
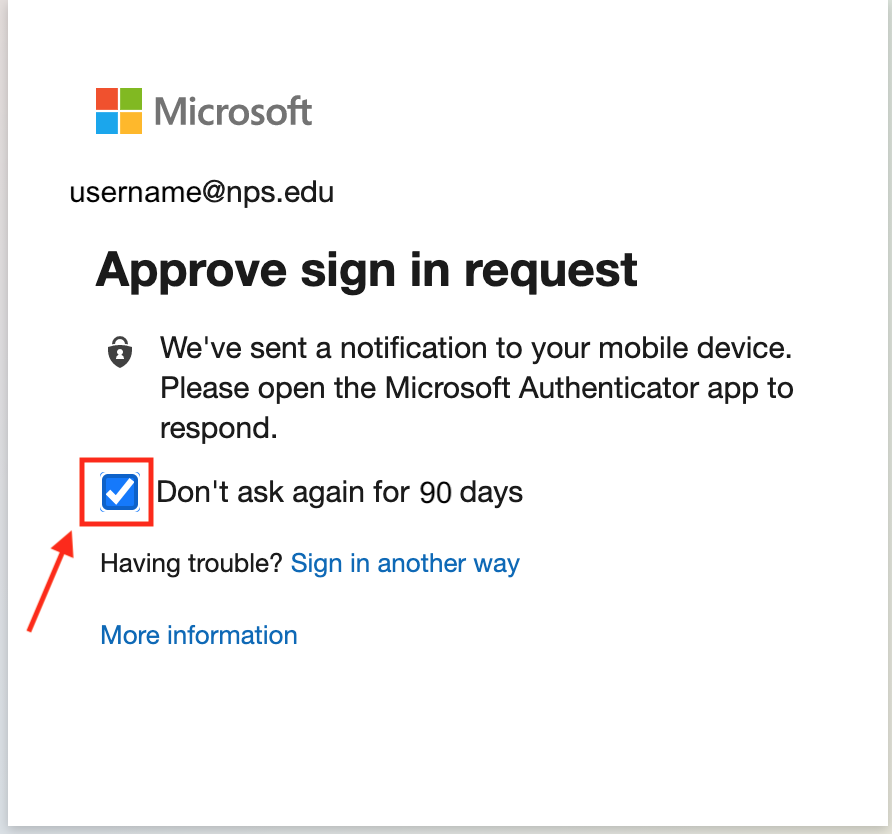
After signing in to Microsoft Office 365 with username and password, you will be re-directed to the following screen for MFA.
- Go to https://office365.nps.edu.
- Enter username and password then click Sign in.
- Verify you have a checkbox for Don't ask again for X days.
- Accept the notification on your app.
a. Not using the app? Follow instructions on the phone call or enter the code from the Text/SMS message.
b. Don't have that phone on you, click Sign in another way and choose a device you have. - You are logged in!


Recommended Security Settings for Microsoft Authenticator App
Enable App Lock : You can protect your MFA account(s) with a screen lock on your Microsoft Authenticator app. When enabled, you will be required to open and access the app with the same method you do by default for your phone lock-screen (e.g., thumbprint, face recognition, pin).
- Click Menu button on Microsoft Authenticator app
- Click Settings
- Click App Lock
- You will now require a thumbprint, face recognition, pin, etc. to open the app and for each MFA.
Frequently Asked Questions (FAQs)
Frequently Asked Questions (FAQs)
See Microsoft's FAQ page for more.
I have Cloud Backup set up
See Backup Microsoft Authenticator app to restore your account.
New phone with the SAME number
-
If your preferred MFA option is text, you will receive a text to your new phone since it is the same number. If your preferred MFA option is not text, select Sign in another way to choose to receive a text to your same phone number.
- Once you are signed in, go to the MFA Self Enrollment Portal to remove your old device as an MFA option.
- Enroll your new phone with the app.
New phone with a DIFFERENT number and I DO have another device enrolled in Microsoft
- If your preferred MFA option is not sent to your alternate device, select Sign in another way to choose the alternate device.
- Once you are signed in, go to the MFA Self Enrollment Portal to remove your old number and old device as an MFA option.
- Enroll your new phone with the app and new number.
New phone with a DIFFERENT number and I DO NOT have another device enrolled in Microsoft
Contact the Technology Assistance Center (TAC) at (831)656-1046 or ithelp@nps.edu.
Contact the Technology Assistance Center (TAC) at (831) 656-1046 or ithelp@nps.edu.
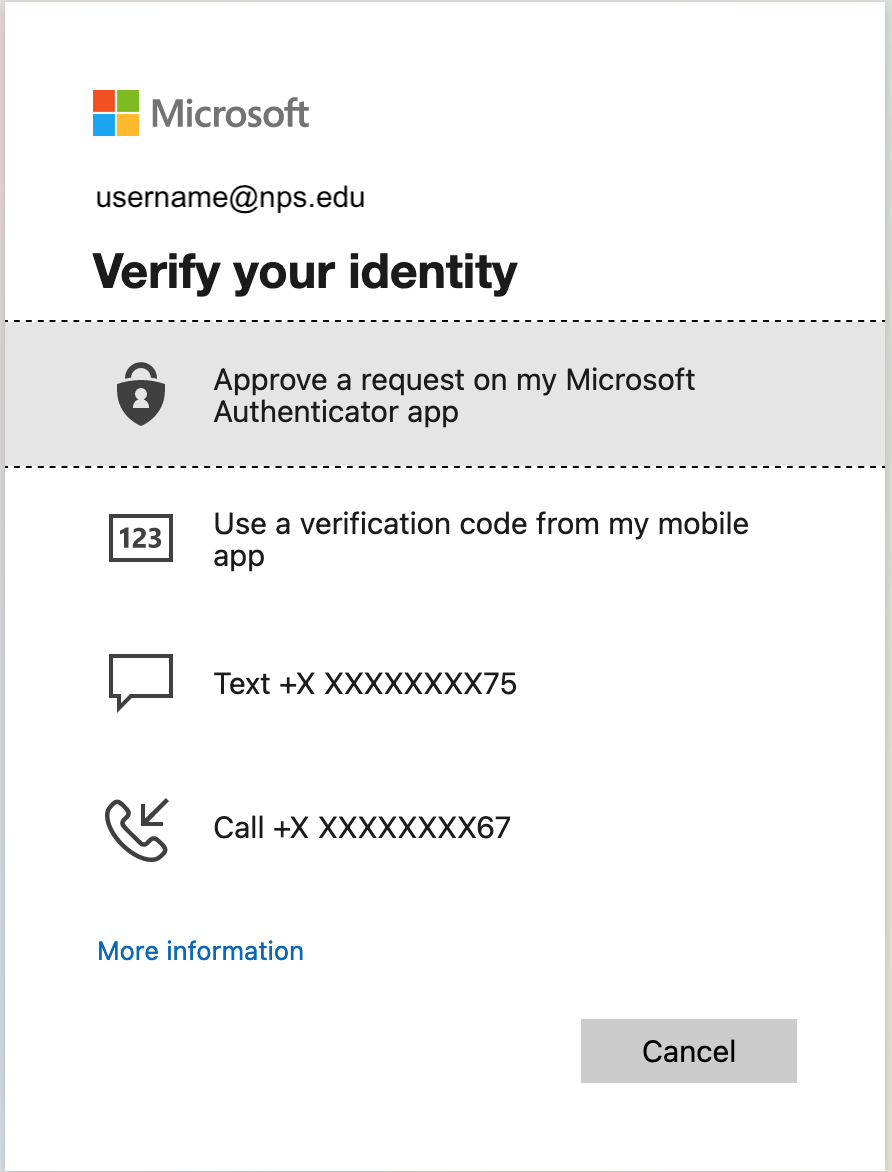
There are three options you may choose: receive a Microsoft Authenticator app notification, use a verification code from the app, or a text message (SMS).
It’s quicker than a text or typing out a verification code.
- Authenticating with a text message requires waiting to receive the text, reading a verification code, and then typing it in.
-
Microsoft Authenticator app is as simple as approving a notification on your smartphone.
It's more secure.
-
Microsoft Authenticator uses cutting-edge end-to-end encryption that SMS can’t.
-
The Microsoft Authenticator screen displays detailed information about the source and account that initiated the authentication request.
Here is a list of the devices you can use with Microsoft MFA to complete your two-step login process. We recommend that you enroll at least two devices so that you'll have a backup way to authenticate should you lose or misplace your first device.
-
Android phones and tablets
-
iPhones and iPads
-
Apple Watches
-
Windows Mobile
-
cell phone with sms messages
- Go to MFA Self Enrollment Portal.
- Click Setup Authenticator App.
- Click the menu button on the top right. Note: This may be 3 dots or a + symbol depending on your phone.
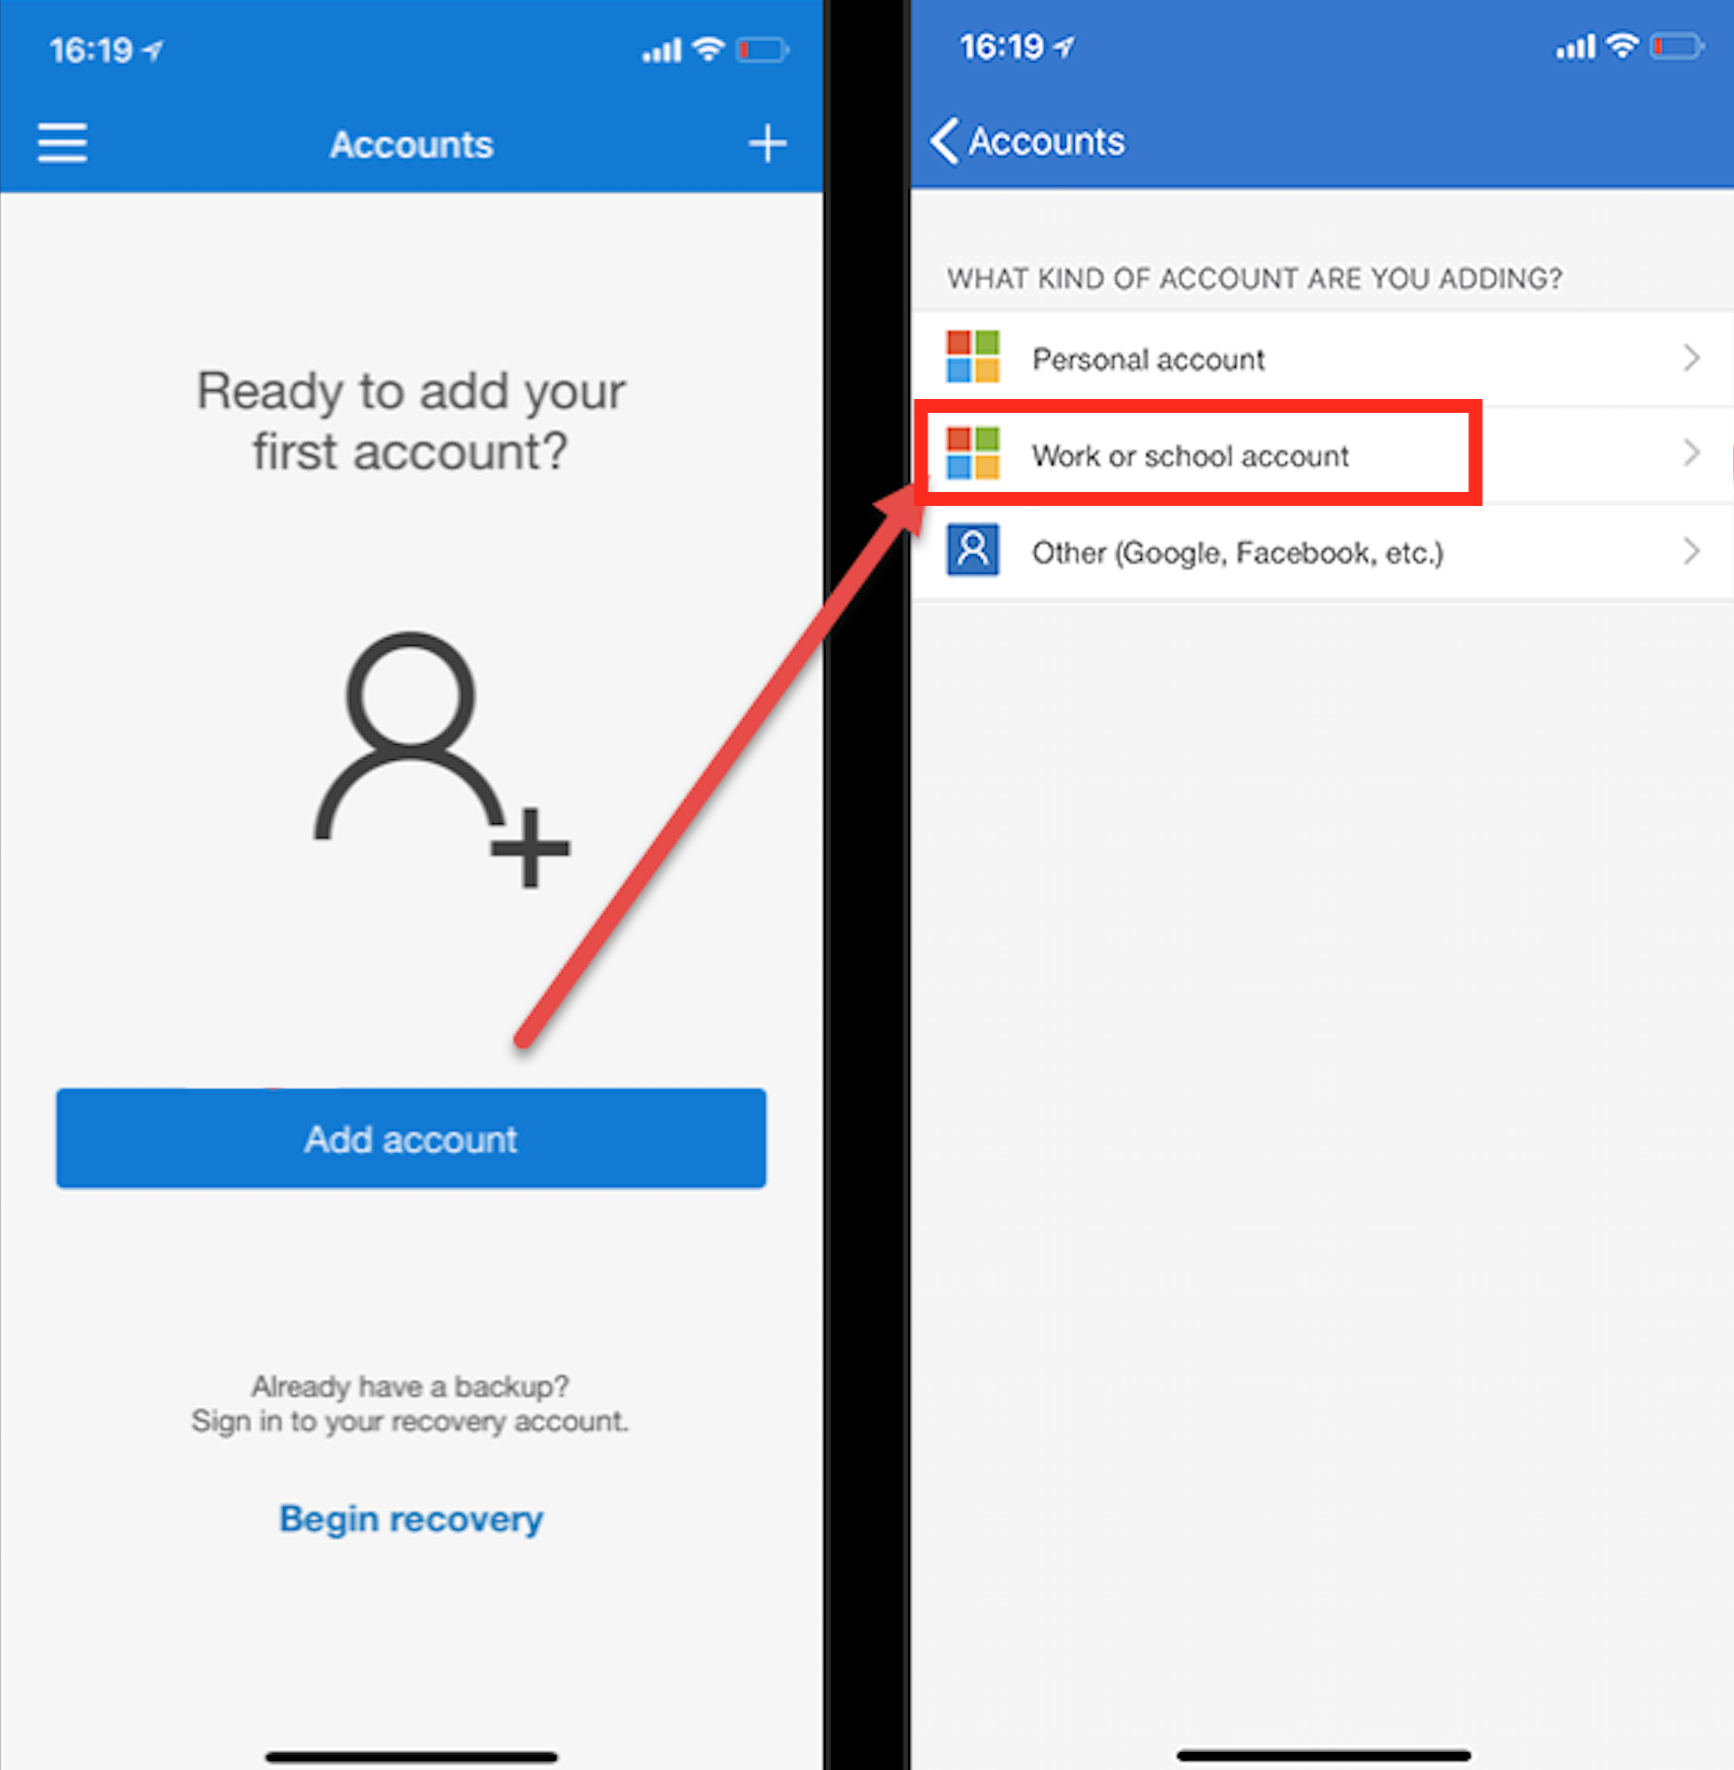
- Click + Add account.
- Select the Work or school account option.
- Scan the QR Code with the app and click Done.
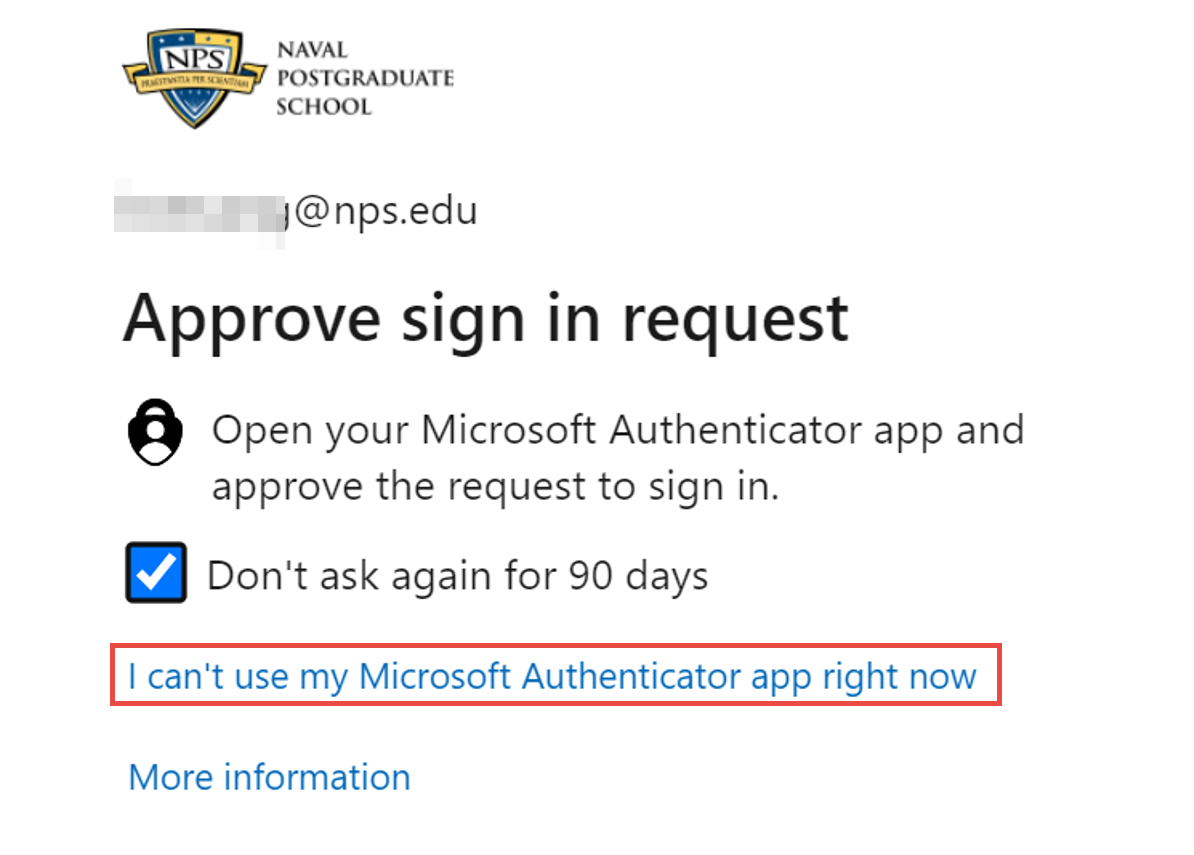
When prompted for MFA, click I can't use my Microsoft Authenticator app right now. Choose from your list of options. This list will vary depending on how many devices you have enrolled. Need to enroll other devices? Follow steps in the above FAQ.
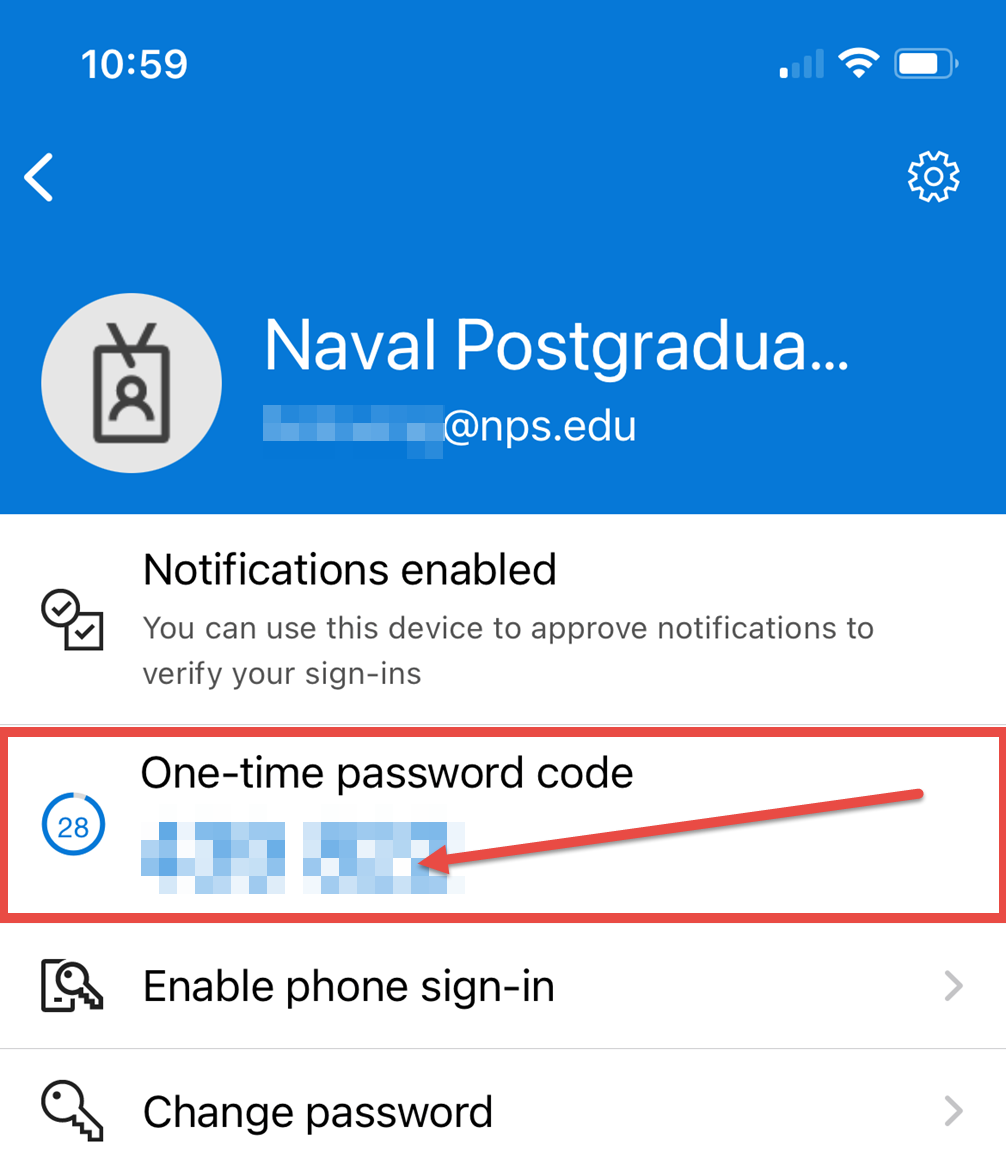
Microsoft will work while on travel. If connected to Wi-Fi, you will receive Microsoft Authenticator app notifications normally. If you have data access, you can receive calls/texts. If you do not have Wi-Fi or data at your location, you can use the verification codes automatically generated in the app in the bar with "Naval Postgraduate School." Verification codes are updated every 30 seconds. This code can be used when authenticating with Microsoft.
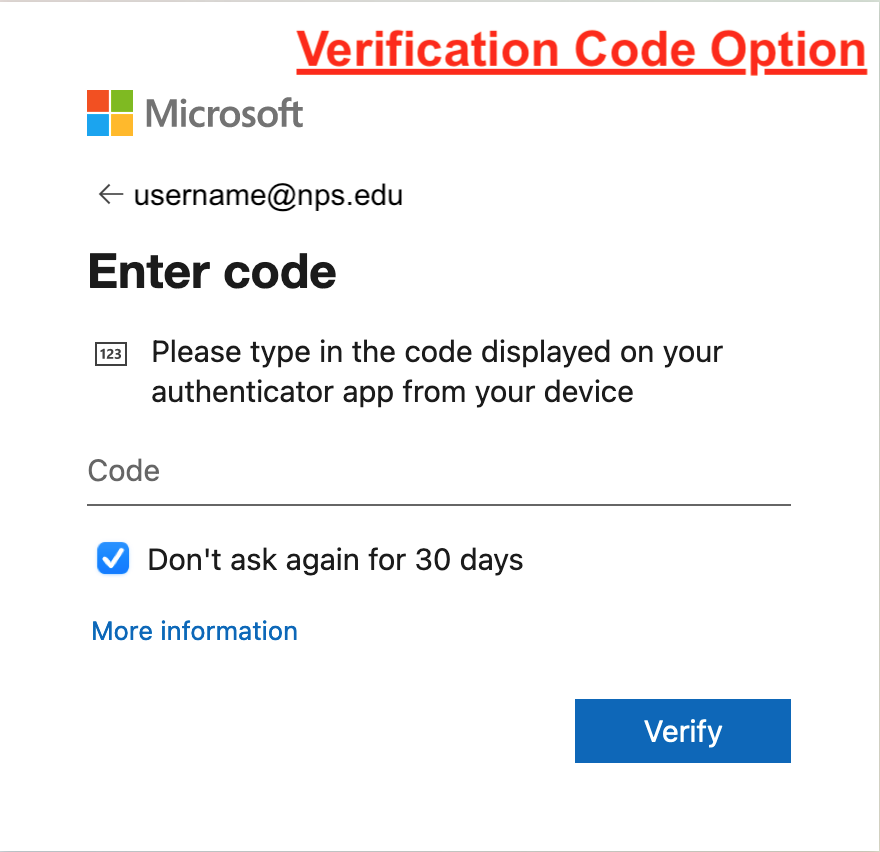
Here is how to use a passcode:
- Log in with username/password like normal
- When prompted for MFA, click I can't use my Microsoft Authenticator app right now
- Choose Use a verification code
- On smartphone, open Microsoft Authenticator app and select the Naval Postgraduate School profile.
- Enter the 6-digit One-time password code (they only last 30 seconds!) from phone app.
- Check the box for Don't ask again for X days
- Click Verify


Try Microsoft's Troubleshooting Steps
Still not working? Reactivate Microsoft Authenticator or contact the Technology Assistance Center (TAC) at ithelp@nps.edu or (831)656-1046.
Recommended Troubleshooting Solution
The Remember Device function is set to 90 days to suppress the second factor during Multi-Factor Authentication (MFA). Any change to one of the conditions below will prompt for an MFA authentication code again.
1. If you are logging in from another device:
- You’re using a different browser
- You're using a different computer.
- You’ve turned on private browsing.
2. A change in IP Address is detected
- You’re using a different internet connection (change of network).
3. If the browser is not correctly caching the data
- You are using your Browser in Private Mode/ Incognito Mode.
- Your browser, browser extension, plug-in or anti-virus may clear cookies after closing.
- You’ve cleared cookies from your browser, or cookies are not enabled.
- Your browser security settings do not allow cookies to be saved.
Cookie Settings
- Cookie settings can be found in Safari under Safari > Preferences > Privacy
- In Firefox by going to Firefox > Preferences > Privacy > Firefox Will: Use Custom Settings for History
- In Internet Explorer at Tools > Internet Options > Privacy . Adjust the slider for the Internet zone to allow third-party cookies to be stored.
- In Chrome under Settings > Show advanced settings > Content settings
Visit Microsoft's list of Common Problems page with problem scenarios and common fixes.
You can view all the apps at Microsoft My Apps.
On this page:
- Multi-Factor Authentication (MFA) Registration
- What is Multi-Factor Authentication (MFA)?
- How To Register/Manage your NPS User MFA Settings?
- Before setting up MFA, please read the following:
- Registering Your Security Information
- Recommended Security Settings for Microsoft Authenticator App
- Frequently Asked Questions (FAQs)
Related: