SharePoint, Upload and Edit with Video - Thesis Processing Office
Nested Applications
SharePoint, upload instructions
Uploading to SharePoint
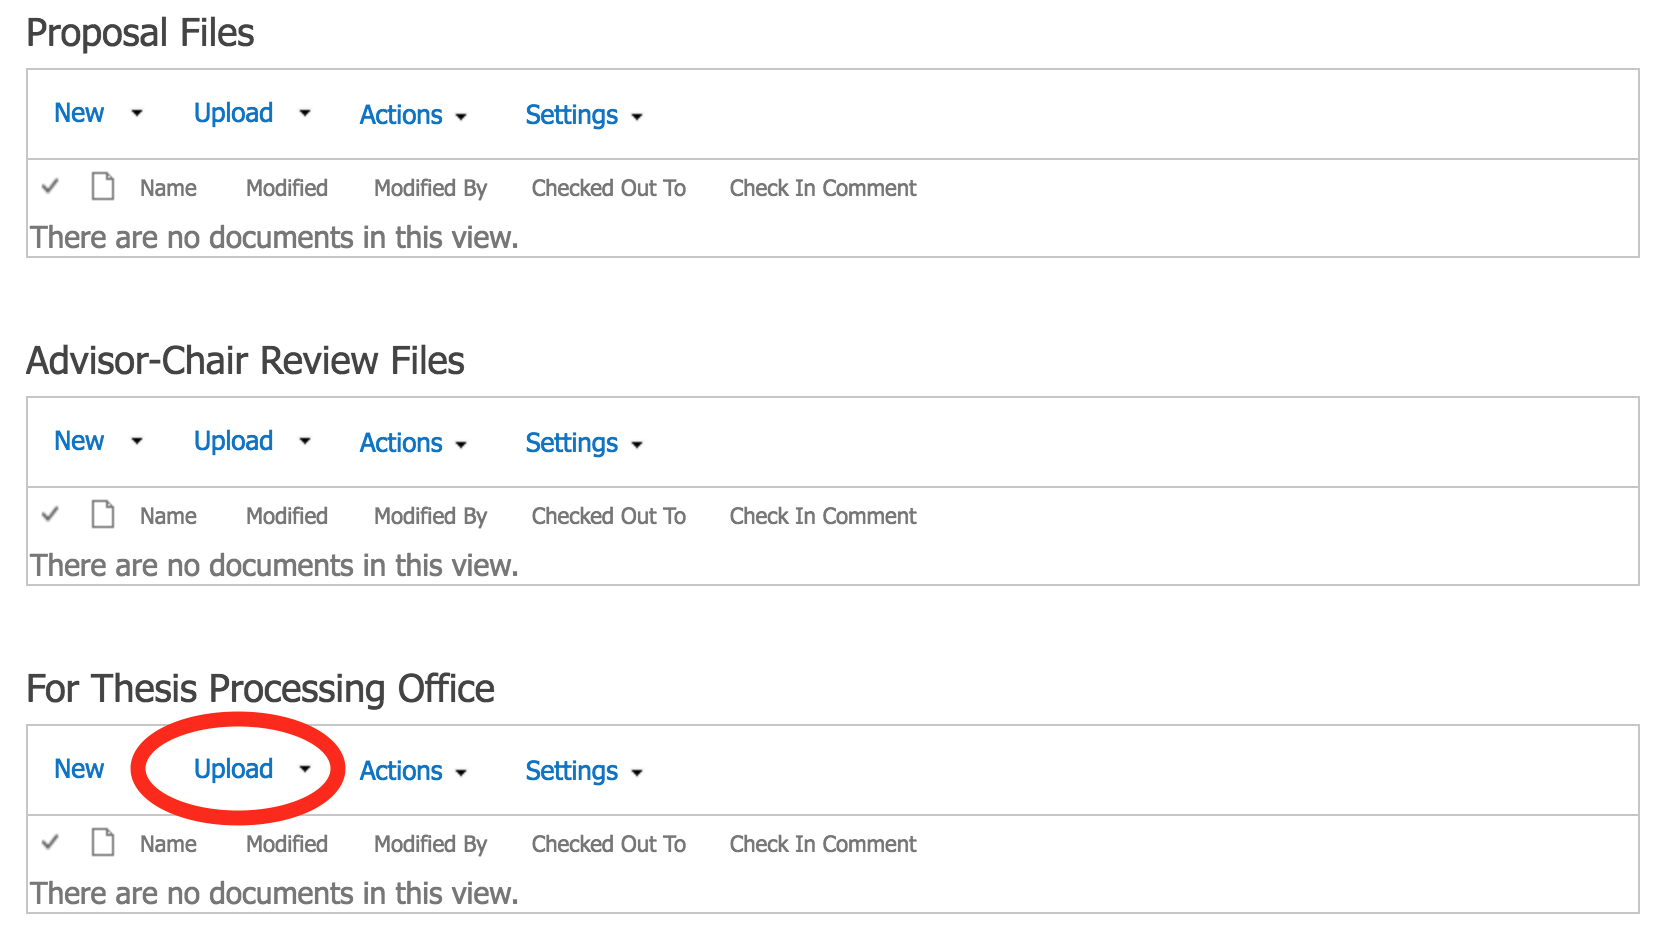
At the bottom of your site, go to the desired folder.
Click the Upload button.
Click Choose File and select the file on your computer.

Optional: Enter a comment in the Version Comments box.
Click OK.
A new window will appear. Click Check In.
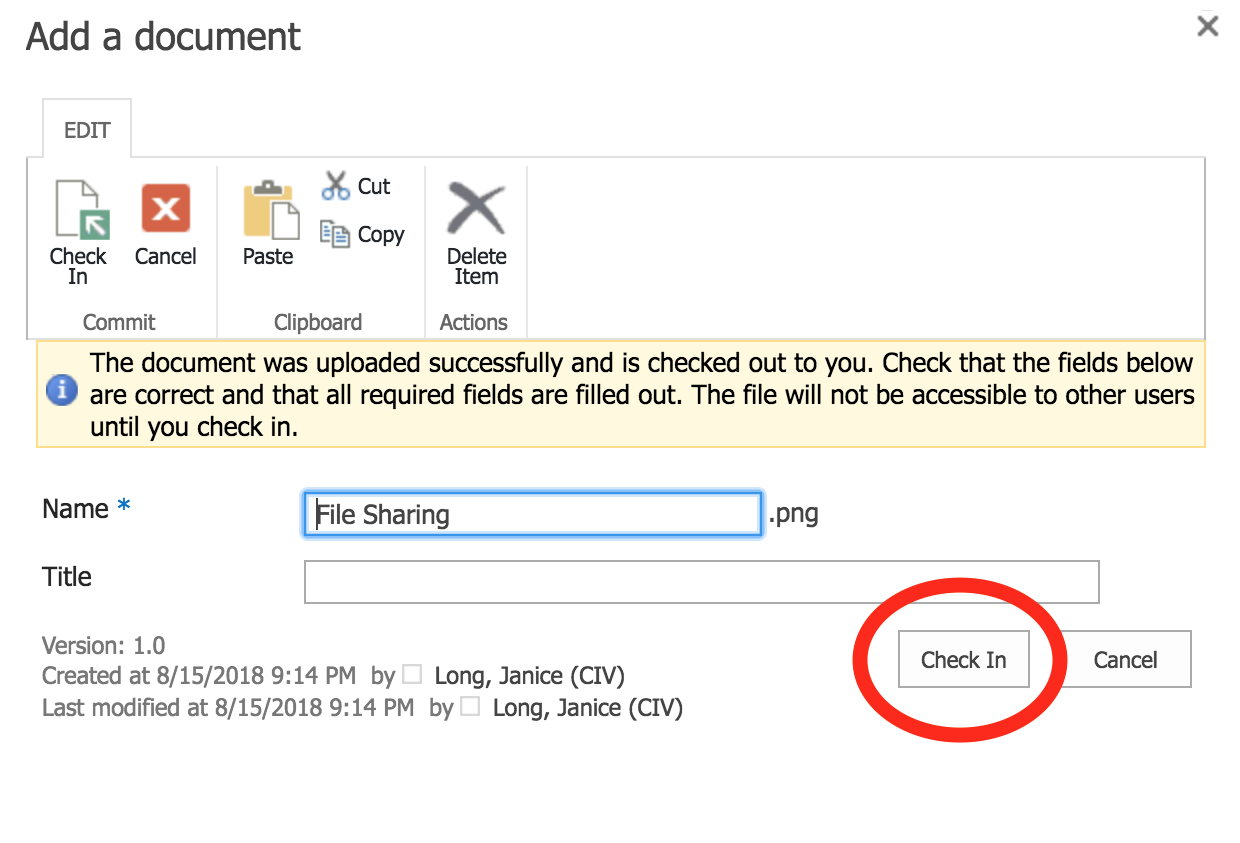
If you don't do the last step, others can't see the file!
SharePoint, editing tips, with art
Downloading from SharePoint
Warning: Work offline to prevent corrupting your template, losing your work to a server timeout, or syncing failure:
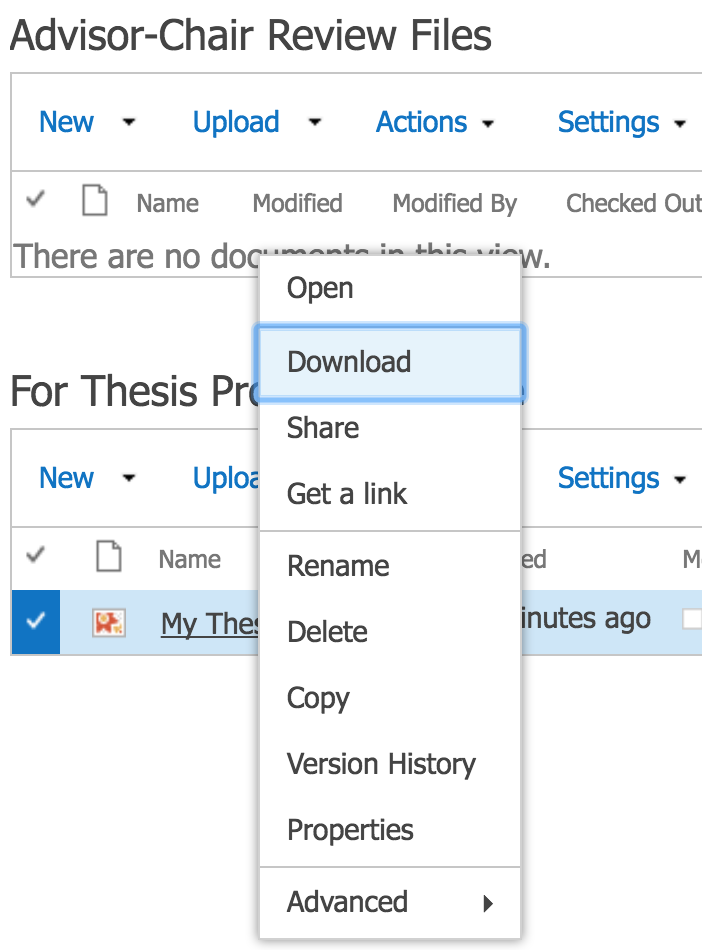
Click on the three dots next to the file name.

Choose Download and save it to your computer.
Signal to others that you are in the file:
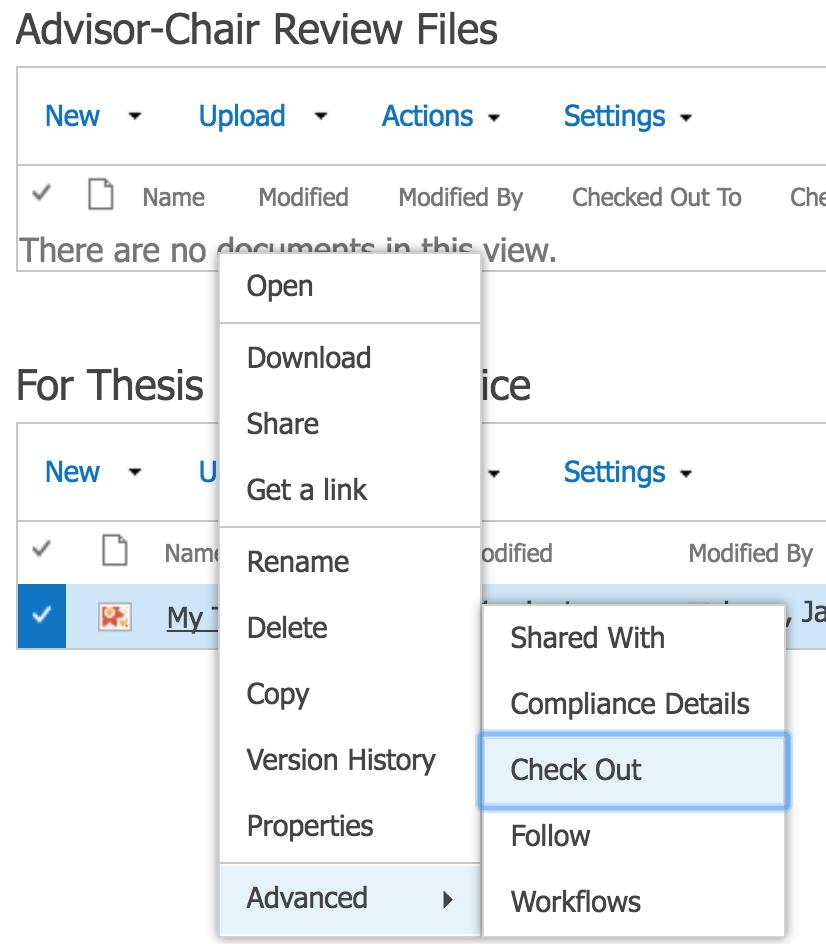
•Go back to your SharePoint site
•Right-click on the file you just downloaded
•Choose Advanced
•Click Check Out. Your name will appear in the "Checked Out To" column. This prevents against multiple people working on the file at the same time.